How to create vendor bill in invoicing application?
To create vendor bill in Metro ERP's Invoicing App, follow these steps:
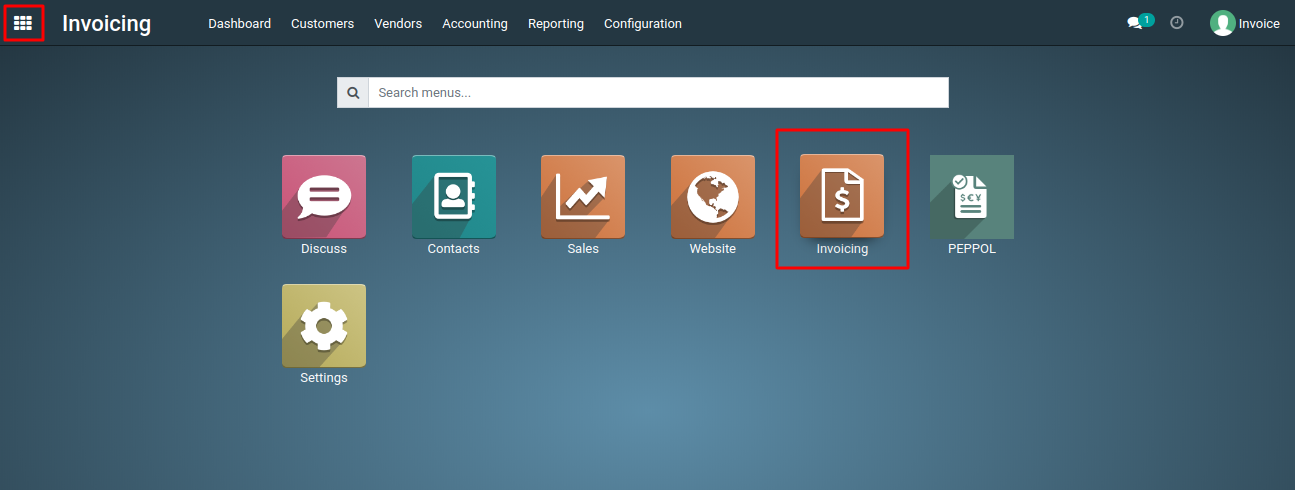
1) Go to the "Invoicing" module by clicking on its icon in the main dashboard or using the application menu.
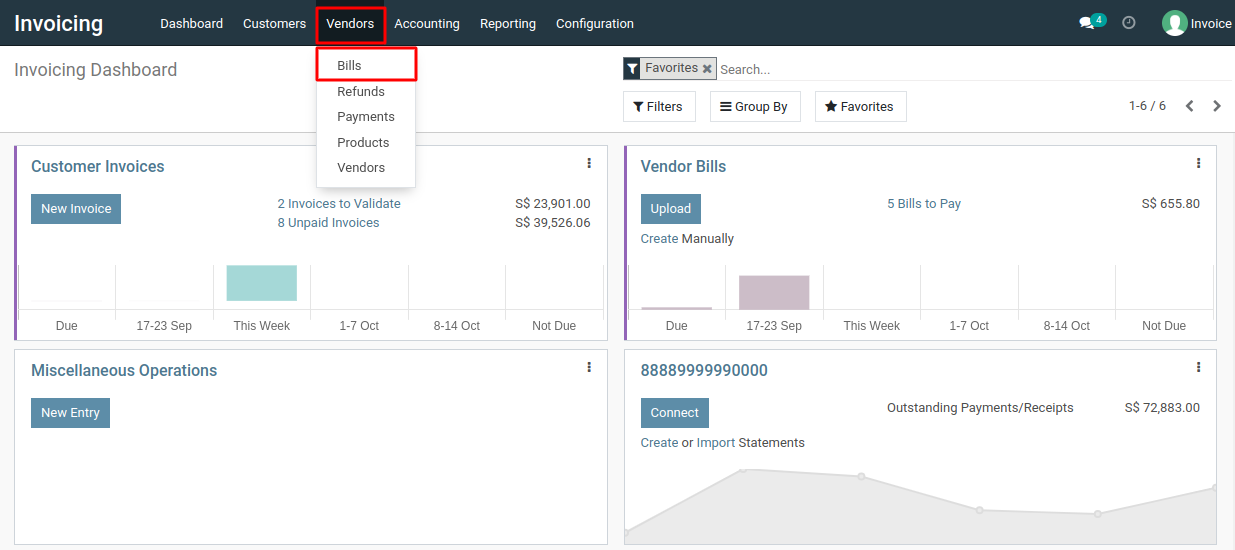
2) Inside the Invoicing module, go to the "Vendors" menu and then select "Bills."
3) Click on the "Create" button to start creating a new vendor bill.

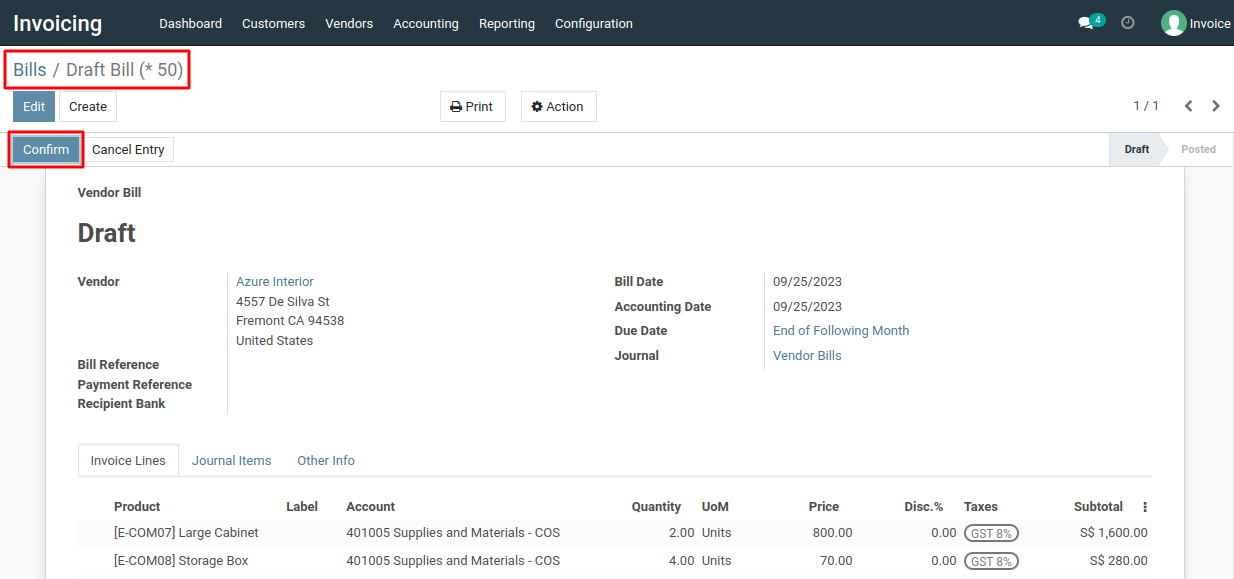
4) Fill in the invoice details, including the vendor name, bill date, accounting date, dua date, reference, journal and any additional information.
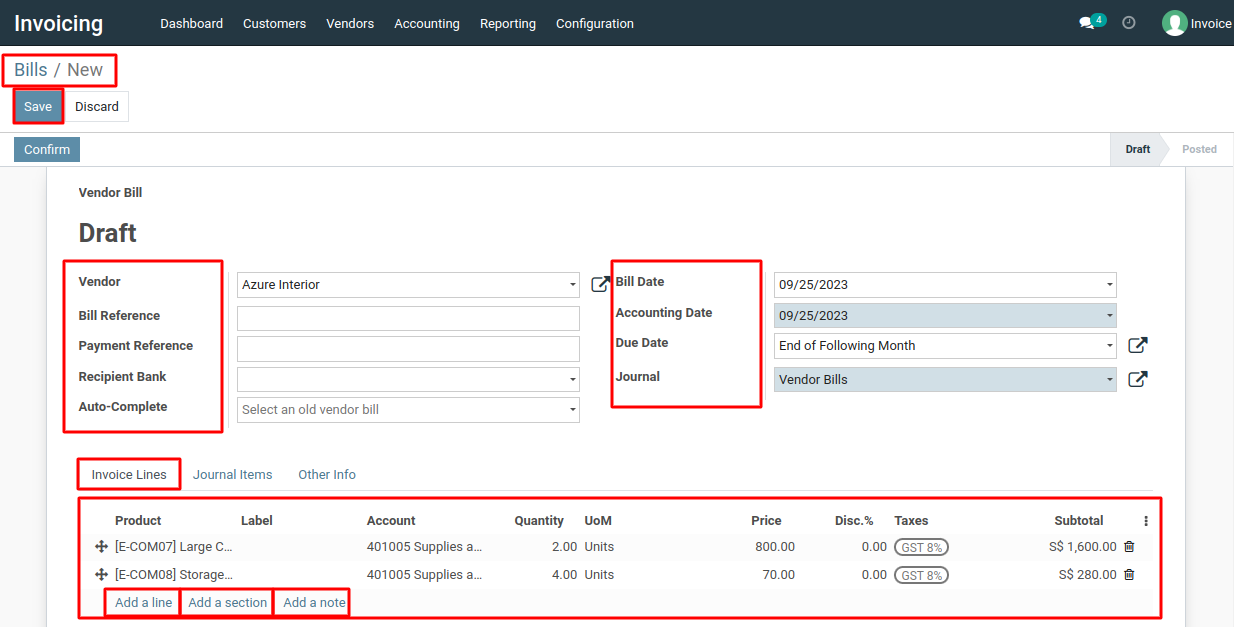
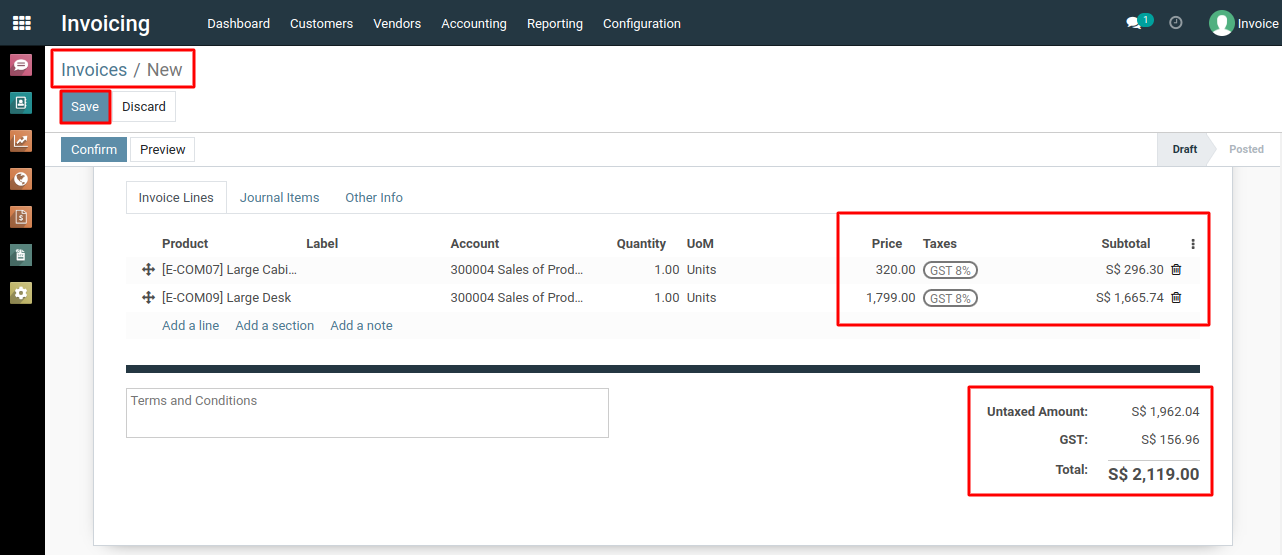
5) Scroll down to the "Invoice Lines" section and click "Add a Line" option. Here, you can add products or services, quantity, unit price, taxes, and description for each line item.
6) The system will automatically calculate taxes and the total amount based on the invoice lines and tax rules you've set up.
7) You can also add relevant information or add notes to the bill using the "Add a section" and "Add a note" options.
8) After entering all the necessary information, you can save the vendor bill as a draft by clicking "Save" button.
9) Review the bill to ensure all details are accurate. Once you're satisfied, confirm the bill by clicking "Confirm."
10) After confirming the bill, you can proceed with the payment process, by clicking "Register Payment" button.
To create vendor bill, please do contact us at support@metrogroup.solutions