How to apply discount to an invoice in accounting application?
To apply discount to an invoice in Metro ERP's accounting App, follow these steps:
1) Go to the "Accounting" module by clicking on its icon in the main dashboard or using the application menu.

2) Create a new invoice or edit an existing one.
3) In the invoice form, scroll down to the "Invoice Lines" section.
4) Now, click on three dots menu and check the option, Once select the Disc% so you can see the discount column in the invoice table.

5) Add the products or services to the invoice by clicking on the "Add a Line" button.
In the invoice line you've added, you'll find a "Discount" field. This is where you can specify the discount percentage or amount for that line.
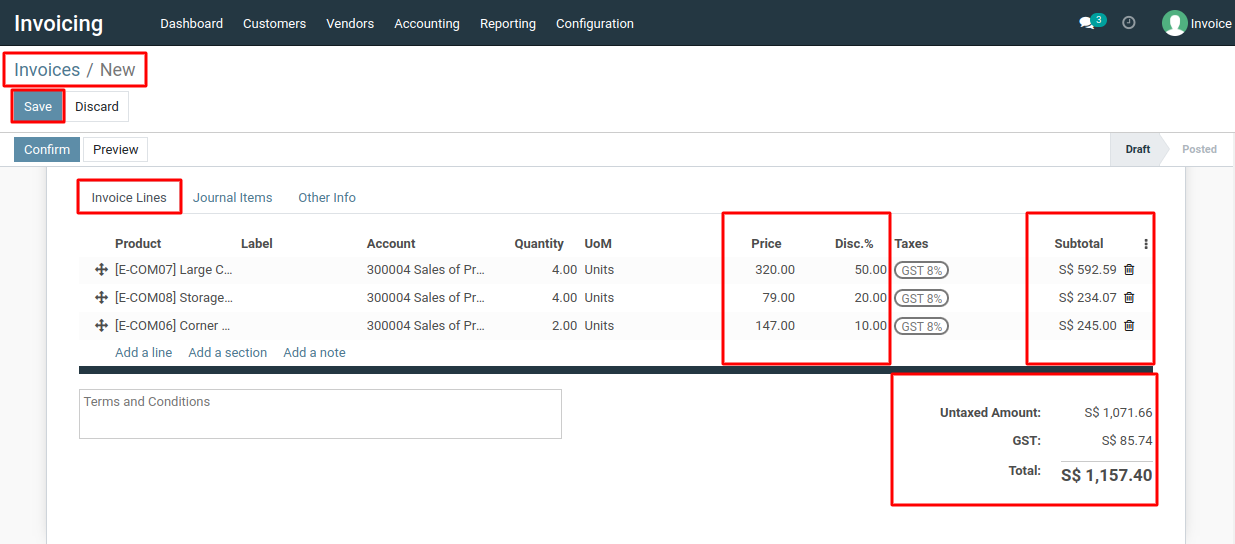
6) Enter the discount value, either as a percentage (e.g., 10%) or a fixed amount (e.g., $50), depending on your preference.
7) After entering the discount value, system will automatically calculate the discounted amount for that line and deduct it from the line's total.
8) The subtotal of the line (before applying the discount) and the discounted total will be displayed.
9) You can repeat the process for each product or service line where you want to apply a discount.
10) If you have multiple lines with discounts, system will calculate the total discounted amount for the entire invoice.
11) If everything looks correct, click on the "Save" button to create and save the invoice.
To apply discount to an invoice, please do contact us at support@metrogroup.solutions