How to create internal transfer in inventory application?
To create internal transfer in Metro ERP's Inventory App, follow these steps:
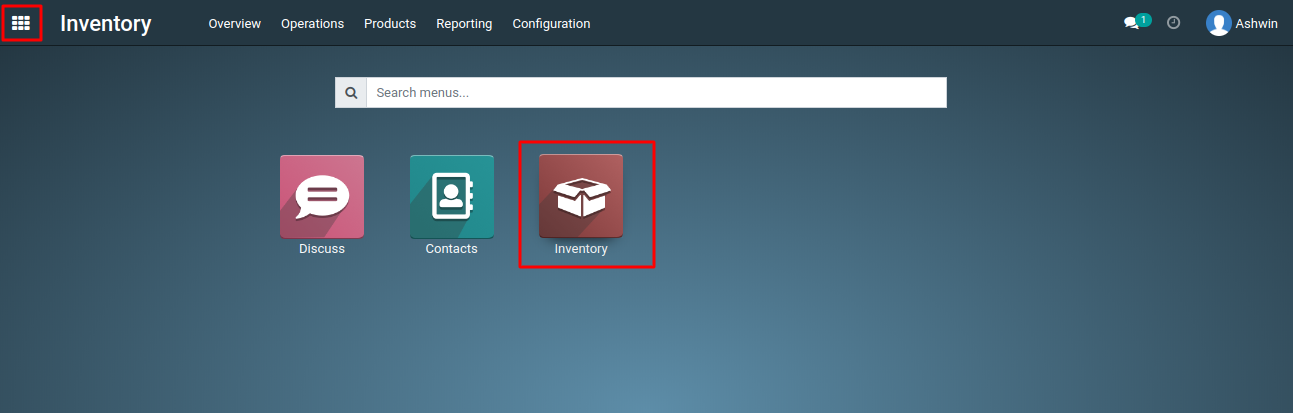
1) Go to the "Inventory" module by clicking on its icon in the main dashboard or using the application menu.
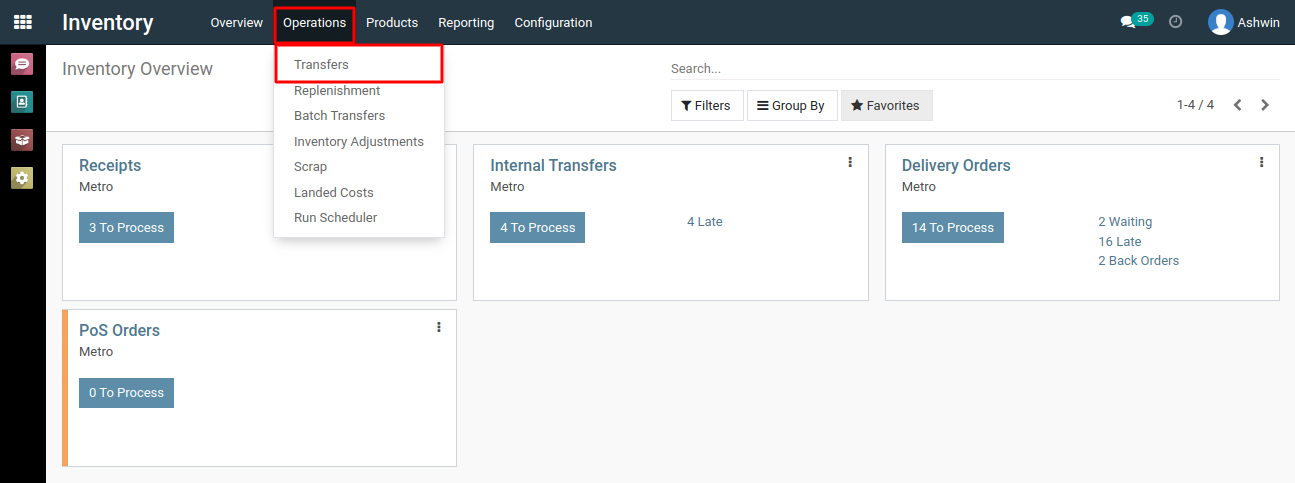
2) Inside the Inventory module, look for the "Operations" menu, then navigate to "Transfers" This is where you can create internal transfer orders.
3) Click on the 'Create' button to create a new internal transfer orders.
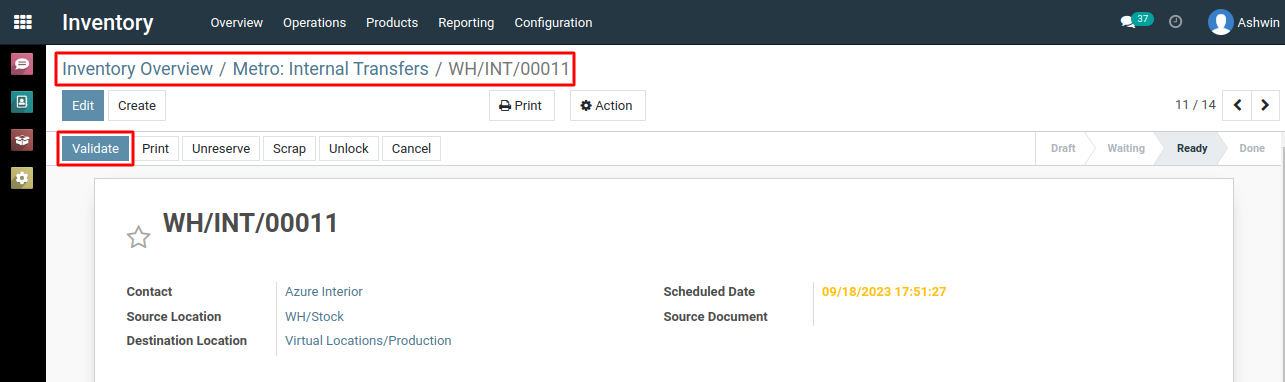
4) In the transfer form, select the source and destination locations for the transfer.
5) Add the products that you want to transfer by clicking on the "Add a line" button and selecting the product and quantity.
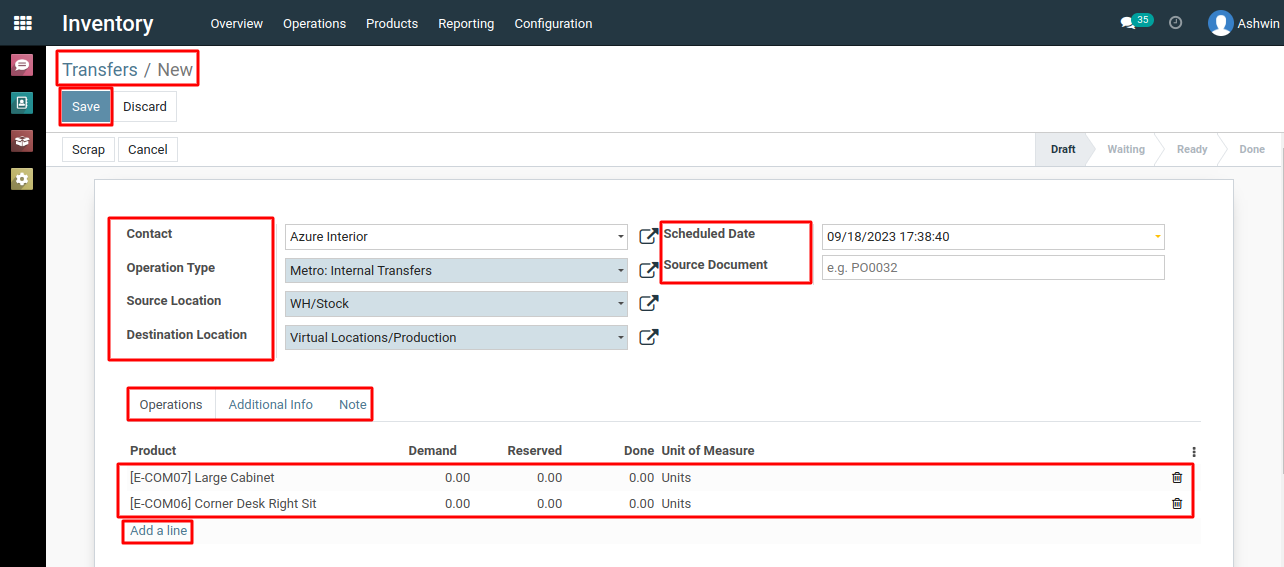
6) If necessary, you can also add a transfer reference or a note.
7) Click on the "Save" button to save the transfer.
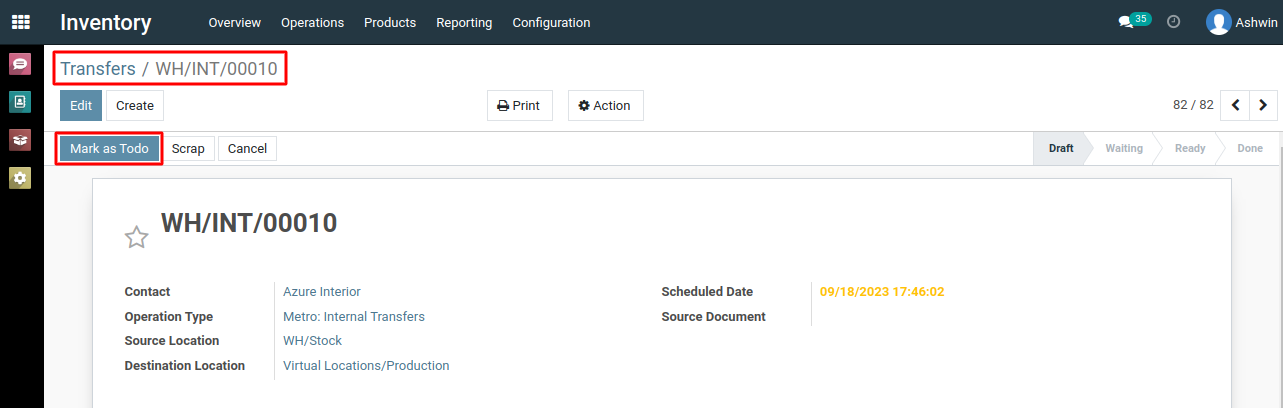
8)Click on "Mark as Todo" button.
9) Then Click on "Check availability" button.
10) Next Click on "Validate" button.
10) Once the transfer is validated, you can proceed to physically move the products from the source location to the destination location.
11) Confirm the successful transfer of products and ensure that stock quantities are updated accordingly in both locations.
To create internal transfers order, please do contact us at support@metrogroup.solutions